Monday, December 2, 2013

Lazy Almond Brittle

Thanksgiving has come and past, and Christmas edges closer each day. As we helped decorate the tree yesterday, that holiday spirit started to get under my skin. For the entirety of my life, my family has upheld traditions of spending time together playing Christmas tunes, keeping cozy by the fire, and, most importantly, cooking lots of goodies. So as the holidays roll in, my pallet starts to turn to an assortment of comforting sweets.

Making these tasty devils is at least half of the fun, but I'll be honest, today I'm feeling a bit lazy. I've had faaaar too many days off in a row, and I'm sure you've heard that bit about "a body at rest tends to stay at rest"?... well, that's me. Fortunately, I have a fool proof, easy-as-it-gets holiday treat that is perfect for my predicament (or lack thereof). This recipe was given to me by my friends in Virginia that we stayed with last winter. They were pros at converting awesome recipes into slightly-healthier awesome recipes. This isn't exactly on the top of the list of health foods but my theory for staying healthy is not to completely ditch all those tasty things you've indulged in your whole life. Eat them in moderation and put thought into each ingredient, buying the best you can afford. On that note, let's break out the pasture butter, and sucanat!

Almond Brittle

1 stick Butter
1 cup Sucanat, or Raw Sugar
2 Tbsp. Maple Syrup
1 cup Raw Almonds, roughly chopped

Heat Butter, Sucanat, and Maple Syrup in sauce pan over medium heat, stir to combine. Leave on medium heat for about 20 minutes, letting mixture get nice and thick. I like to test if the brittle is ready by letting a drop cool on parchment, if it becomes hard and crunchy, take pan off of heat and stir in almonds. Immediately pour onto parchment, spreading to desired thickness. Let cool completely (10-15 minutes) before digging in!

You could also add shredded coconut and dried cranberries, to turn this into an extra special treat. Break out the cute tins and printed parchment, and you've got an tasty holiday gift. I actually considered turning todays batch into a gift... but I don't think I'm really feeling up to it this time around :)


Tuesday, November 26, 2013

Easy-Peasy Parmesan Potatoes


I'm not exactly the world's biggest fan of potatoes. Actually, the only time I ever use potatoes is when I toss them in a soup to thicken it up, aside from that potatoes and I aren't really on speaking terms.

This is probably because they are one of the top culprits for pesticides when grown conventionally, so it's of dire importance that I buy only organically grown taters. Although I can find organic potatoes at the health food store, they're always shipped from far off and what return am I getting out of this unsustainable purchase? Bland starch.

You may now be convinced that I'm not into potatoes, but when winter rolls around all of our local farmers bring these awesome specimens to market in every variety of color and knarly shape. How can I faithfully remain a tater-hater? I must give in. So I picked up these little yellow fingerlings that are cute as buttons and fit in wonderfully on the counter with my other produce. Once I got used to looking at them just sitting there, it dawns on me, "I've got to do something with these guys." I'm not feeling soup.... so what to do? Um... butter?...and....parmesan? Heck yes! And how about using the last few brussel sprouts, you can't screw up with butter and parmesan, can you? Definitely not.

Easy-Peasy Parmesan Potatoes (& Friend)
1 lb Fingerling Potatoes, sliced long ways
5-10 Brussel Sprouts, cut in half (opt.)
1/4 cup Butter, melted
1/4 cup Grated Parmesan
1/2 tsp Garlic Powder
1 tsp Dried Rosemary (opt.)
Melt butter and spread in 9x13 pan. Sprinkle parmesan, garlic powder, and rosemary in a layer over butter, and lay sliced potatoes and brussel sprouts face down in mixture. Bake at 400 for about 25 minutes or until potatoes are tender. Allow to cool at least 5 minutes before removing from pan (otherwise the parm won't stick).
Serve with plain Greek yogurt for dipping.
And go on and love you some little potatoes!

Keep-Me-Healthy Hummus

It seems like the weather has everybody down these days. Fevers to sneezes to ear aches to tummy troubles, winter has brought an array of uncomfortable companions. But they aren't the only ones riding in on winter's shoulders, with the cold comes the holiday season bearing good tidings... and sugar and starch and very few leafy green vegetables. It sounds like a recipe for immunity self destruct, but I'm fortunate that despite a few of my pre-holiday indulgences my immune system has stood by me, keeping me afloat.

Now I must tell you, I don't have a crazy awesome immune system trained by Chuck Norris. But I guess you could say it's trained by The Beatles, (WARNING cheesy punch line ahead) since I get by with a little help from my friends. :)

The "friends" that I count on to get me by cold and flu season are ginger, green tea, honey, fresh local veggies, and lots of garlic. Garlic may give you terrible breath but it's a small con that's seriously outweighed by the pros. My favorite property of garlic is that it is antifungal and antiviral. It's sort of a ninja just waiting for some bug to try to come into your system... so it can karate chop it in the throat! It's also anti-inflammatory, great for your cardiovascular system, and makes you unappealing to mosquitos. I should mention it causes you to be very unpopular in Transylvania, which I guess could be a good or bad thing depending on whether you're team Edward or team Jacob.

Today I'm making a very simple snack  that includes all of my best seasonal friends, garlic hummus with turnip "hearts" and ginger green tea. Hummus is a very popular Middle Eastern dip/spread that owes much of it's distinct and delicious flavor to one of it's main ingredients: Tahini or sesame seed paste. Once I got a taste for this paste, I started throwing it in everything from stir fry's to desserts! I like to buy East Wind brand tahini because it's Missouri made, it can be found in any Missouri health food store and most HyVees near the peanut butter.

Garlic Hummus
1 can Chickpeas
1/4 cup Tahini
1/4 cup Lemon Juice
1/4-1/2 cup Olive Oil
5-6 cloves Fresh Garlic
1/2 tsp Sea salt
1 tsp Ground Coriander (opt.)

Combine all but Chickpeas in food processor or blender and pulse until Garlic is well chopped. Add Chickpeas and blend until smooth (if too thick to blend, add a little more Olive Oil). Serve with a drizzle of Olive Oil on top.

My favorite things for dipping are fresh Hakurei turnips, which are a small white turnip that are milder and sweeter than most radishes. Radishes and carrots are also very tasty with hummus, but whichever root you choose you're sure to get a hefty dose of vitamin-c. I guess I should inform you that turnips always taste better (especially to toddlers) if they are sliced and cut into hearts with a small cookie cutter. Something about that shape just brings out another level of veggie awesomeness.
Of course you need a tasty beverage to go along with your snack so go on and steep a few slices of fresh ginger and some  green tea in hot water for about 3 minutes. Stir in a teaspoon of raw honey and pour over ice. A pretty paper straw makes it go down a little better, but that's just personal preference. :)


Enjoy this gratifying snack knowing you're getting your immune system ahead of the game, one delightful bite at a time!


Monday, November 18, 2013

Japanese Lunch in a Jiffy

 I've got to walk out the door fully clothed and fit to be seen by the public, keys, purse, and lunch in hand in 30 minutes. It's one of those mornings. Yeah...awesome.
I do have a few tricks up my sleeve for mornings such as these, all of which avoid nasty drive-thrus and prepackaged meals. Today I'm going to throw together a super easy soba noodle and green cashew sauce lunch in about 10 minutes, all while getting myself ready for the day.

Soba is a Japanese buckwheat noodle that is traditionally served cold. They have a wonderful smooth texture and lovely flavor that stands alone. These noodles can be found at any Asian market or a well stocked super market in the Asian cuisine section. Usually they are bundled into single serving sizes, which makes measuring a breeze. Cooking for 1 = 1 bundle, cooking for 3 = 3 bundles. Easy peasy!

For Soba:
Toss your bundle(s) into a pot of boiling water cook for 5-7 minutes (or until tender), strain, and rinse with cold water.


Green Cashew Sauce:
1/2 cup Raw Cashews
1 cup Raw Spinach
2 Tiny Onions
3-4 Cloves Garlic
1 inch Fresh Ginger
2 Tbsp Liquid Aminos or Soy Sauce
1/2 cup Water
Squidge of Honey
Drizzle of Sesame Oil

Combine all ingredients in a blender and blend until smooth.

Serve sauce over noodles with a sprinkle of sesame seeds and a few slivers of nori (seaweed) and Bam! You can forget paying someone else to make you a garbage lunch and enjoy yourself a meal that's healthy and delish... not to mention that you made all by yourself in record time. Go you!
As for me, I not only made lunch (and took photos of it) I actually had time to match my socks AND put on eye liner. Now I have SERIOUSLY got to get to work. Ciao!  


Wednesday, November 13, 2013

Cozy Masala Chai

 Gee Minnelli, it's cold. Before it dropped below 40, I was happy as a lark hanging out near the fire place. These days, it doesn't quite cut it. So I dug out my thermals and wooly socks, my slouchy beanie and ugly Christmas sweaters so at least I'm nicely insulated. But when I'm forced to face the cold nothing keeps me cozy quite like a piping hot cup of homemade chai.

Chai is actually just the Hindi word for "tea." In the states, chai is more popularly known as a creamy spice tea drink which can be more accurately called "masala chai" (or mixed spice tea). This comforting beverage originated in India and is traditionally made by steeping tea and spices in a sweetened water and milk mixture. There is no universal recipe for chai but it normally includes ginger, cloves, cinnamon, and cardamom all of which have wonderful body-loving properties.

The list of benefits these lovely spices possess goes on and on, but what they all have in common is that they are both natural tummy soothers and pain relievers. No wonder it's so comforting!

My chai includes a few more ingredients than the basic recipe, all of which can be bought from Natural Grocers, Asian markets, HyVee, or any market that sells wholesale spices. If you want affordable, Asian markets definitely have the best prices, but if you want Organic, Natural Market is the place.
Another variation on the traditional recipe is that I use coconut milk instead of cow's milk. This is because, for one, it tastes amazing and, for duece, Jude and I both have a pesky little aversion to dairy. Make sure to look for coconut milk WITHOUT preservatives. I buy Thai Kitchen coconut milk which is only 30 cents more than the competitor who loads their stuff with preserving poisons. Okay, that may be a bit of an exaggeration, but really 30 cents is worth saving yourself even a smidge of that junk.


Masala Chai
1 can Coconut milk
3 cups Water
2 Cinnamon Sticks
1 Tsp Coriander Seeds
1 Tsp Whole Cloves
1 Tsp Fennel Seeds
1 Tsp Black or Mixed Peppercorns
5-6 Cardamom Pods
1 inch Sliced Fresh Ginger
1 small Rose, Petals only
1 Black Tea Bag
2-4 Tbsp Raw Honey


Combine everything but honey in a small pot and simmer for 30-min to 1 hour. Strain, add honey, and serve hot.
Go ahead and share if you feel like it, you probably won't but it is the thought that counts, right? Or drink it real fast before anyone sees you, then you can use ""what they don't know can't hurt them"... yeah that'll work.


Friday, November 8, 2013

Superb Sourdough Hot Cakes

 
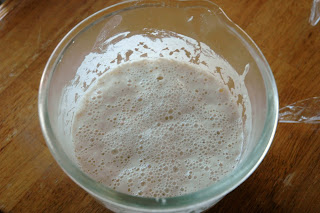
 I'm loving my sourdough starter these days. Something about munching on that tangy bread by a fire is just the epitome of comfort. But I need not stop at it's taste, this yummy stuff has a whole list of reasons to fall in love.

1) Because it has natural yeast, you can throw it into just about any baking project and eliminate steps and ingredients. Sourdough starter = recipe shortcuts.
2) Sourdough is made by a process of fermentation. As it ferments it breaks down the starches and gluten and creates a suitable environment for digestive enzymes to settle in. This means it takes less energy for your body to break down, and leaves more energy for you to use for everything else (in my case chasing a toddler).
3) Sourdough is also said to have a much lower affect on your blood-glucose level than other breads.
4) Sourdough has it's origins rooted back in Ancient Egypt, and many starts have been passed down a dozen generations. So if you like to rock it old skool, sourdough is for you!


Sourdough is as simple as pie, and going from my last experience with making a pie, it's a heck of a lot simpler! Combine any amount of flour with enough water to make a smooth batter. Add some start, cover, and let sit at room temp for 8-12 hours and VIOLA! you have a giant sourdough start to use as you please. It retains it's smooth batter texture but will be full of bubbles.


Because sourdough IS ALIVE (I'd like that to sound as spooky as possible!) it's a bit tricky to get your hands on if you don't already know someone who has some to share, but all is not lost! You can order freeze dried sourdough culture online from CulturesForHealth and get that bad boy going. Also, I am more than happy to share mine with anybody who has an interest in trying it, it's a gift that keeps on giving and I'm  thrilled to pass it on.
Once you have a start going, make sure to save a little back in a jar before using the rest on your project, that way you have something to start the next batch. Two tablespoons, or so, will do and this can be stored indefinitely in the fridge.


Today, I am making some super simple hot cakes. I like to let my dough sour for about 2 days to get a really tangy flavor, but if you use some that has sat for a shorter period your cakes will still be awesome. They will have a very mild flavor, resembling buttermilk pancakes (only 10 times more tasty!).


Sourdough Hot Cakes
2 cups Sourdough Start
2 tbsp. Raw Sugar or Agave
2 tbsp. Coconut Oil or Butter
1 Egg
A Pinch of Sea Salt
A Dash of Baking Soda


Combine start with sugar, oil, egg, and salt in glass or ceramic bowl (no plastic or metal) stirring with a wooden spoon. Be sure to stir batter gently, do not beat. Oil and heat griddle. Add soda to batter right before cooking. At this point treat them like any other hot cake, cooking at medium-high heat on either side. Serve with a drizzle of pure maple syrup.


Be sure to share these yummy gems with anyone you'd like to be better friends with. This will be my third time overnight shipping them to Ryan Gosling via the United States Stalker Post and I'm pretty much expecting a proposal any day now :) But all stalker jokes aside, these cakes are sure to impress so pass them on!


Thursday, October 31, 2013

Purple Haze: The Sequel feat. Easy Wheat Bread

I've decided my leftover "Purple Haze" millet+sweet potato mash would make some pretty awesome veggie burgers. So I'll need to throw together a loaf of bread before work to have something to put them on. This is by far the easiest, most versatile, and best slicing wheat bread recipe... like... ever.
Easy Wheat Bread:
1 cup Whole Wheat Flour
1 cup Unbleached White Flour
2 Tbsp Olive Oil
2 Tbsp Honey
1 Tbsp Flaxseed Meal
1 tsp Yeast
1 tsp Sea Salt
3/4 cup Warm Water
I use a bread machine to make my dough. It makes bread making immensely easy, and you can find a bread machine for a couple of bucks at practically any Goodwill or other large thrift store. I tend to double the recipe most of the time and it fits fine as dough in my machine. Add your ingredients to the machine, set to dough cycle and let it go. Once it beeps, place dough in an oiled bread pan, cover with a damp towel, and let rise in a warm place for 45 minutes to an hour. If you don't have a bread machine, combine ingredients in a large bowl, knead for a couple of minutes, let rise in a warm place for an hour, knead, place in bread pan then let rise another hour or so (if doubling, divide into two loaf pans). Bake 'em off at 375 for 25-30 minutes. Let cool slightly before slicing, then enjoy.
My favorite variations of this bread are a 4 seed bread (1 tbsp. or so of each pumpkin, flax, chia, and poppy seeds) and a vitamin-b garlic bread (1 tbsp. fresh garlic, 2 tbsp. nutritional yeast). Try adding something of your own and let me know how you like it!
To make the burgers, take about 2 cups of the millet+sweet potato mash and add one large egg and some more cumin and cinnamon. This should turn out to be 4 burgers. These are a bit crumbly, as many veggie burgers are, but if you want them to be a little sturdier add a 1/4 cup of oatflour (1/4 cup plus 2 tbsps. rolled oats pulsed in the blender makes 1/4 oat flour). Pat them out into burgers and cook on medium/high heat in an oiled skillet, about 45 seconds on each side.
 Serve with toppings like greens, avocado, sliced gouda, sprouts, red onion, and, of course, some home-made bread and you've got yourself one heck of a sandwich!